|
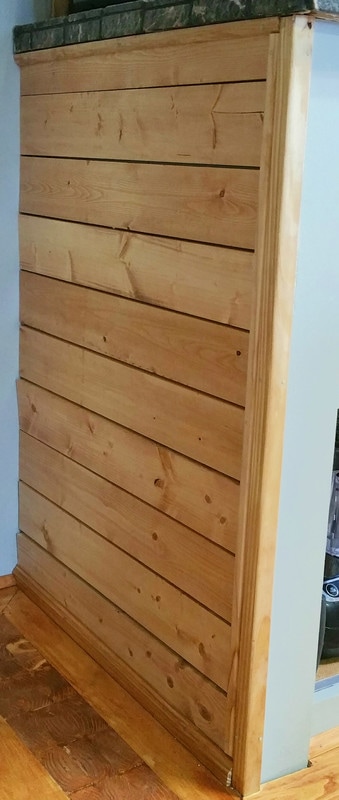
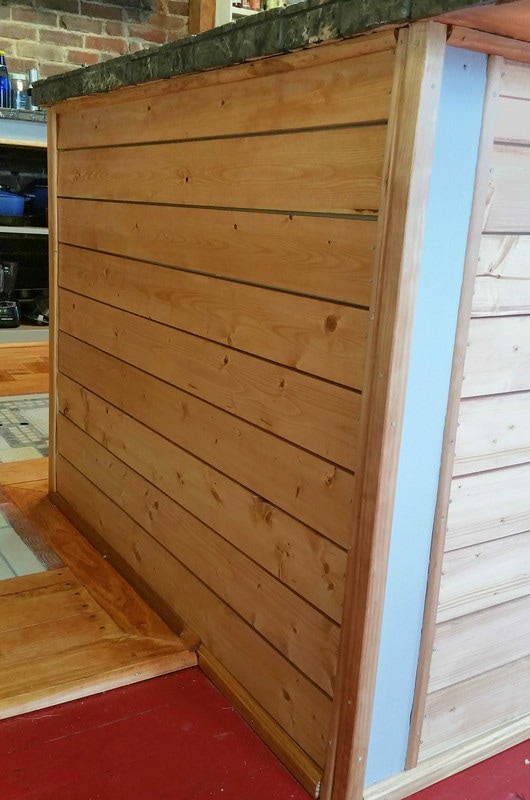
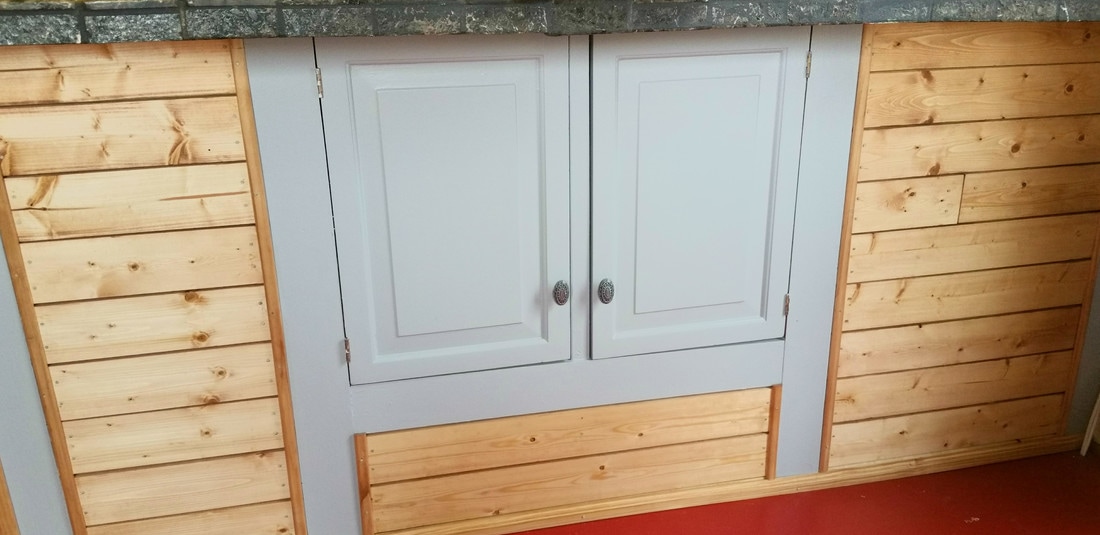
I almost always take off the week between Christmas and New Year's. And with that time, I almost always tackle a big winter project. Gray, wet, and (sometimes) cold Nashville winter does not inspire me. A big winter project is the antidote. This year's project was my kitchen. I live in a 1909 Victorian house in the East Nashville area of Nashville, TN. I love my house. Not only does it hold nearly 28 years of our family's memories, I think it's beautiful in it's own right. These houses have good bones, but no surprise, after being alive and loved hard for well over a hundred years, they also need ongoing time and attention. There were two badly designed rooms when we bought the house. The downstairs bath, which finally was the object of my winter project 3 years ago, and the kitchen. The renovation that was done before we bought the house was clearly imagined by someone who never cooked or had friends over. Ugh. It was not something we could afford to tackle for a number of years. But about 15 years ago, post divorce, and with the help of a significant other at the time who had all of those skills, we gutted and redesigned it. Friends in the neighborhood said it was transformed from arguably the worst kitchen in the neighborhood to one of the best. I'm still happy with the layout, but after 15 years, well, you know...things get weary. The back half of the kitchen was originally either a different room or more likely, a back porch. The walls and ceiling are beadboard. So, we used faux beadboard to face the new island. At the time, I thought it looked fine, but over the years, I thought it looked weak. I painted it a few years ago in hopes of making it look more solid. Ehh. The other thing that started to grow on me was that "no one wants to be a finish carpenter" thing. We did install quarter round on the floor all those years ago, but we didn't really trim out the island or cooktop/counter shelf area; without those finishing touches, there's a subtle message that says 'not professional'. Time for an upgrade! After taking a day to paint a pretty gray over a poorly chosen green from a year or so ago, I took the next couple of days to accomplish the refacing and trim. The meat of the project however was the floor. There remain original heart pine floors in most rooms of the house, however as can be imagined, there are places where there was too much damage over time to save them. (When we moved in there was a lot...a lot...of mediocre carpet. Ugh. I tore that all out within the first few years, uncovering good and damaged wood. There's tile now in a couple of rooms.) The floor in the kitchen was covered with roll linoleum that was installed improperly and after a few months began pulling away from the walls. It's funny now, but then, not so much. Removing the crappy linoleum revealed 95% good, but 5% damaged wood. I removed the damaged areas as best I could and patched the areas with new wood. The aesthetic solution at that point was floor paint. I love painted floors. I repainted the floor every few years and that was good until the last year or two. The patched places got loose and some other places that had been questionable ten years ago, had continued to deteriorate. Time for a new floor. And since this was a winter project, why go conventional when I could design something one-of-a-kind? Wood and tile. What could be better? After long consideration of either stripes of alternating wood and tile, a chevron pattern of alternating wood and tile, or squares, I ultimately decided on squares. Finally making a decision, the design had only just begun. I spent several hours measuring, remeasuring, determining how to get (mostly) consistent sized squares and how to address the 'extra' areas. Once that was all done, it seemed so obvious in hindsight...funny....
The progression went like this:
Tiling!! Early in the process, I started with the larger elements in each square and played around with the smaller tiles that would border and fill in. This is what the kitchen looked like for a few days. While each square is very different, for overall visual harmony, each square uses a few of the same long marble pieces and each has small circular elements. There is also terrazzo tiles in all but one square. So here's a look, square by square...
Grout and done! (Except for sealing the tile in a couple more weeks.) 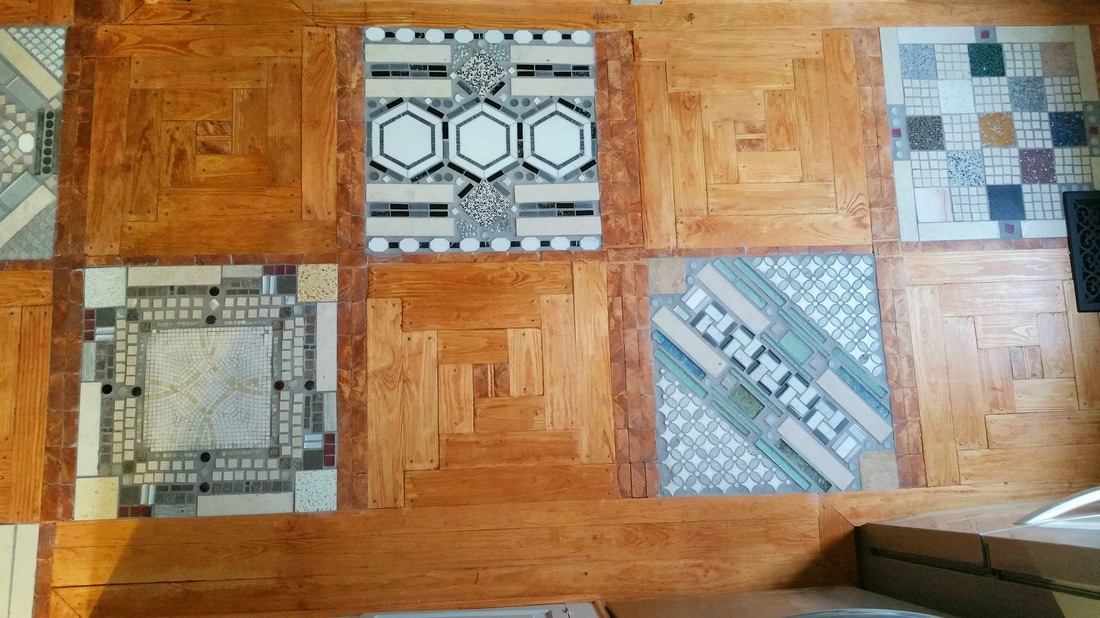 This is the space inbetween the island and the cooktop/counter and shelves. 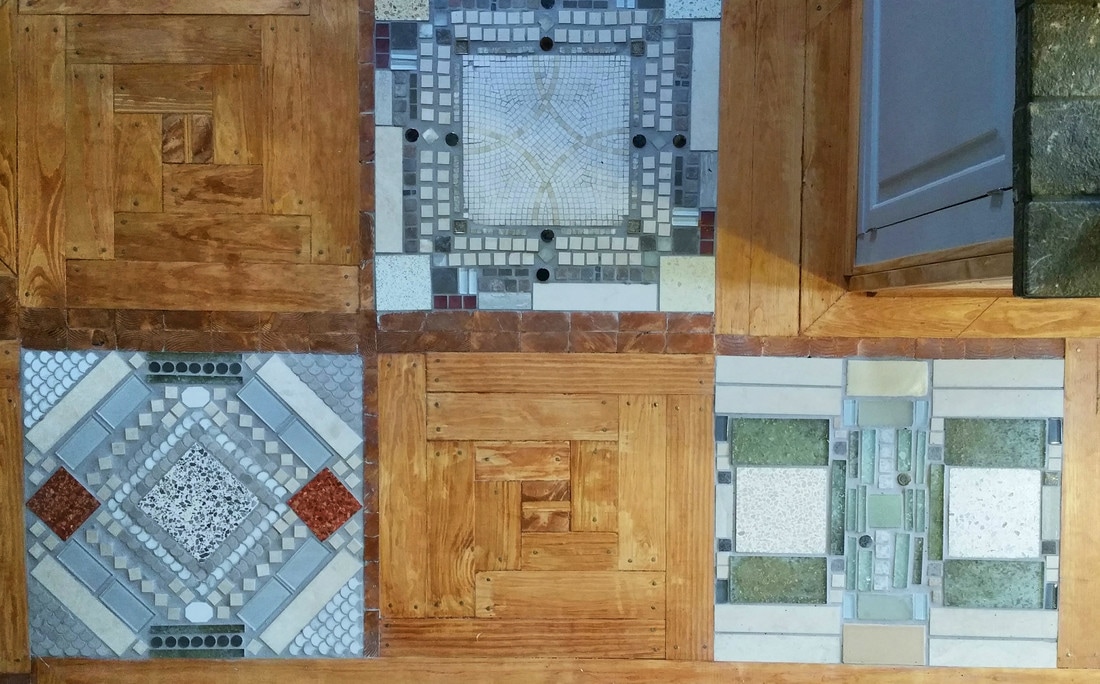 This is the walk-through from the dining room to the back of the kitchen. Together, the floor makes a "T". What's your project? I'd love to hear about it!
1 Comment
|

Hi, I'm Donna. Long time artisan/creative. Full time work in nonprofit world. Mother of two adult sons. Currently, also mother of two cats. Recent PostsThe patience project. Because patience is a virtue. And a creative challenge.
Don't mess with imperfection. How copper and heat speak for themselves. Politics and Art wage war inside me Write 100 words, take a nap and share your mantra Tile and wood floor...this year's winter project...kitchen renovation Archives
September 2018
Categories
All
|
 RSS Feed